Helpful Tools:
What's included with my Mini X Kit?
- Starlink Mini with Integrated WiFi
- Kickstand
- Mini Pipe Adapter and Flat Mount
- 15m DC Power Cable
- Power Supply
- Starlink Plug
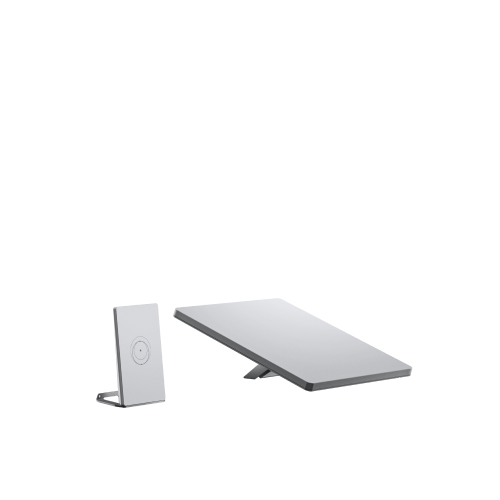
- Router Mini
- Router Mini Power Supply
- Router Mini Stand
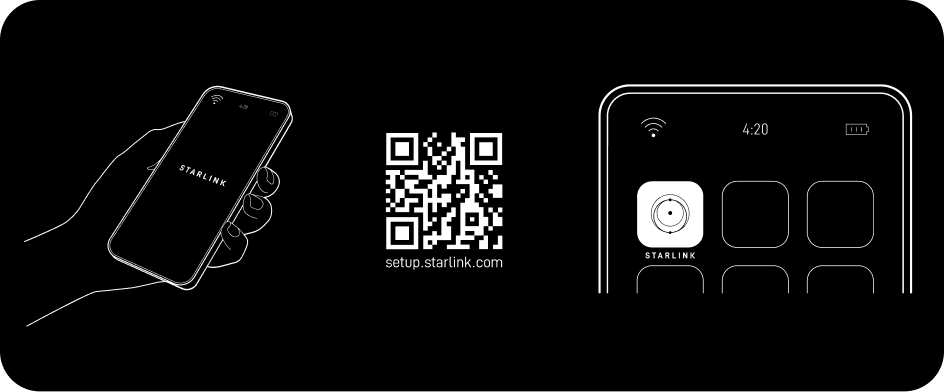
1. Download the Starlink App
Download the Starlink App and scan the QR code located on the kit packaging to step through the install process.
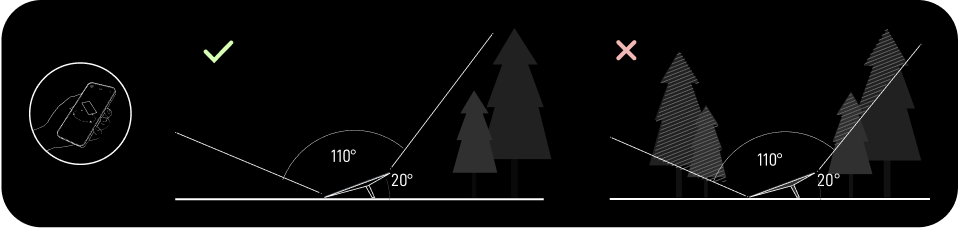
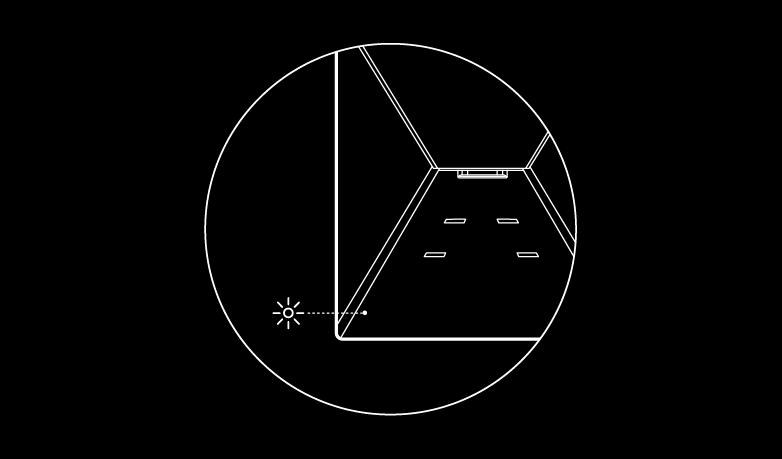
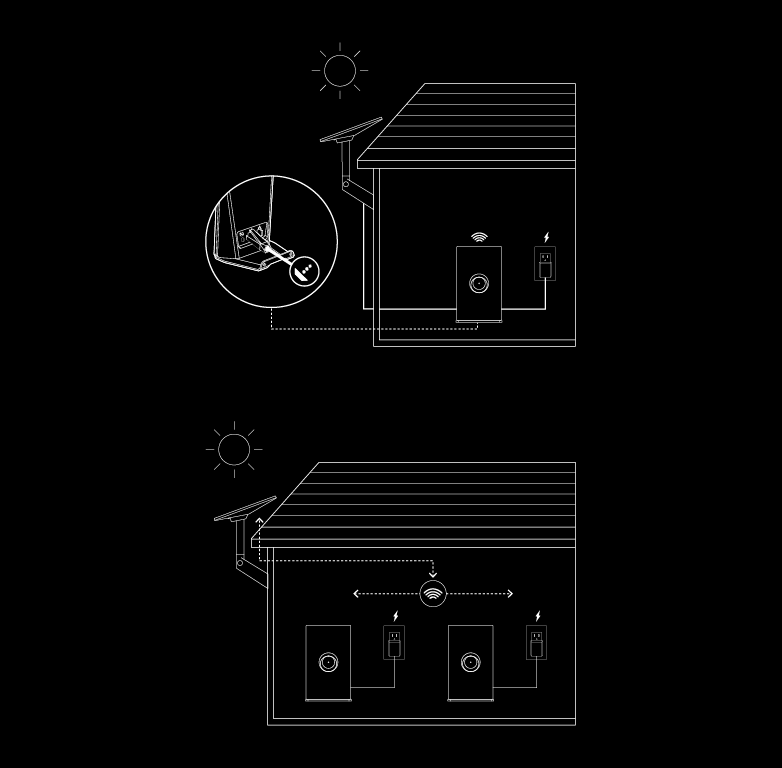
2. Find A Clear View of Sky and Check for Obstructions
Your Starlink needs a clear view of the sky so it can stay connected with satellites as they move overhead. Objects that obstruct the connection between your Starlink and the satellite, such as a tree branch, pole, or roof, will cause service interruptions. Use the obstruction tool in the App to ensure you have selected a suitable mounting location.
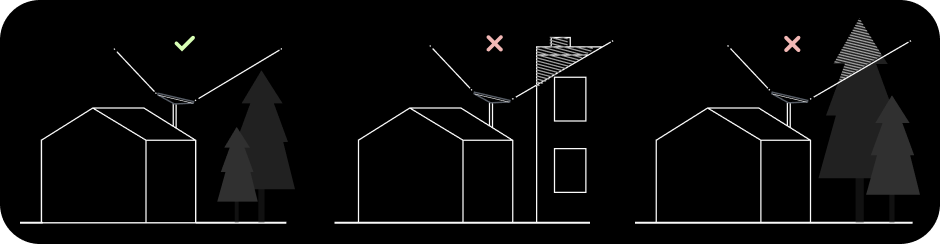
If you could not find a clear field of view from the ground level, consider installing in an elevated location, like a roof, pole, or wall. Additional mounts and accessories are available for purchase on the Starlink Shop.
3. Plug in Starlink
Lift the kickstand and plug one end of the provided cable into your Starlink. Ensure the plug is fully inserted such that the plug face is flush with the surface.
Route the other end of the power cable to your power supply and plug it into a power outlet.

4. Connect to WiFi
a. On your device, find and connect to the STARLINK network in your WiFi settings.
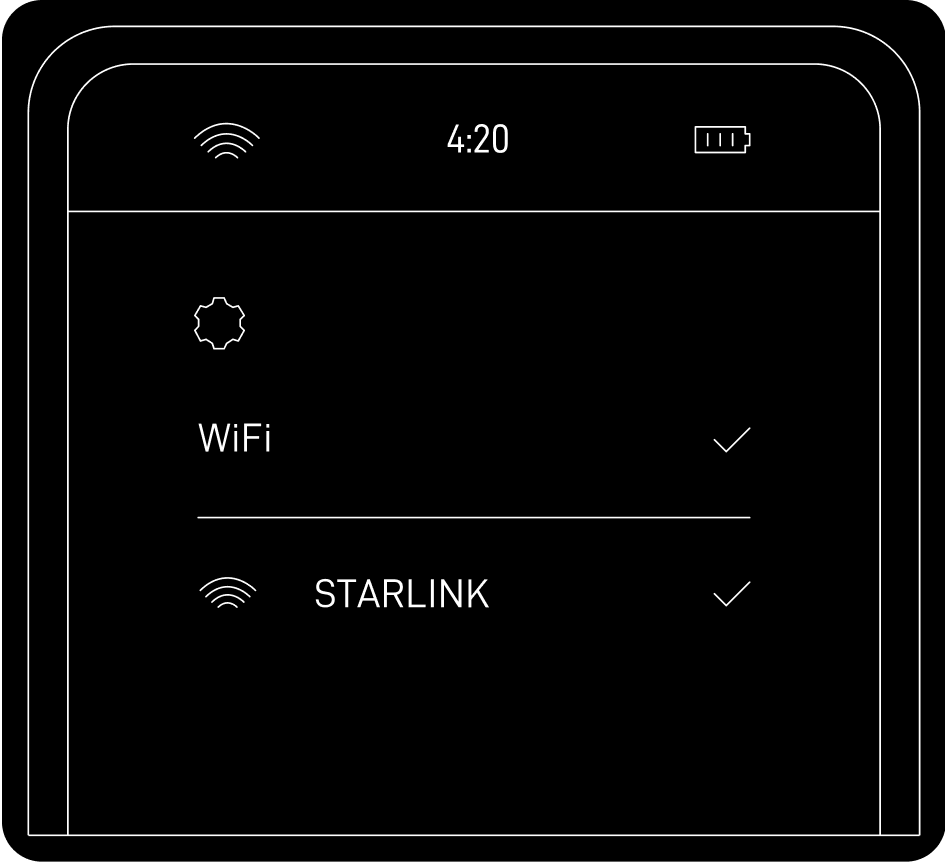
b. You are now connected! Open the Starlink App to customize additional settings, check your connection, and more.
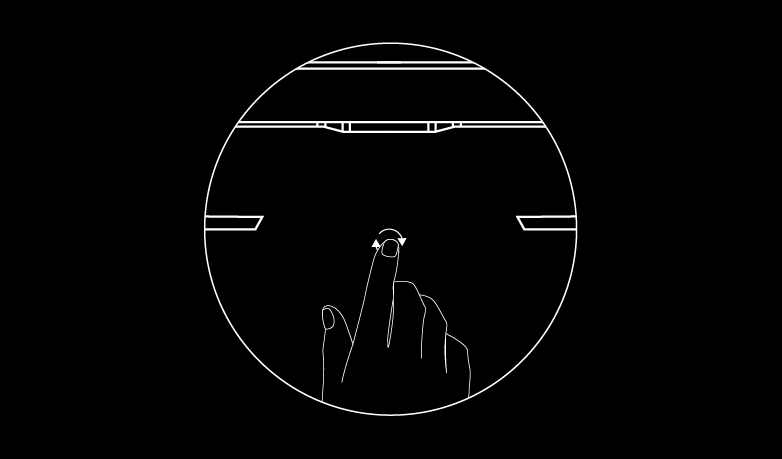
5. Align Starlink
An alert on the App will show if you need to rotate Starlink to be properly aligned. Tap the alert to use the alignment tool.

Can't Get Online?
Open the Starlink App to check for any alerts, outages, or obstructions.
Check the status light on the back of your Starlink.
- Slow Blinking: Powered on.
- No Light: No power to Starlink.
- Fast Blinking: LED will blink quickly for 3 seconds while holding down the reset button, then LED will turn off as your Starlink reboots.
- Make sure everything is securely and fully plugged in and there is no damage to hardware or cables.
- Power cycle your Starlink by unplugging from power and then plugging back in.
- Factory reset the Starlink by locating the reset icon on the back. Press down firmly until you hear or feel a click and hold for 3 seconds. The LED will blink quickly and shutoff when complete.
- If none of these work, contact Starlink Customer Support in the App or the Support section of starlink.com
SETUP ROUTER MESH
1. Set Up Your Starlink
Start by making sure your Starlink is set up and connected to the internet prior to setting up your router.
Connect to your existing Starlink WiFi network from your device.
2. Position the Router(s)
Place the router in the desired location. We recommend the following guidelines for setting up your mesh network:
- Place the router away from thick walls, bulky furniture and large electronics like TVs. For best results, elevate router off the ground such as on a shelf.
- Avoid multiple obstructions (ex: cement walls and metal appliances)
- Mesh nodes connect wirelessly, but a wired connection with Ethernet can provide even better performance.
- Place additional routers no more than two rooms away from each other. Closer placement improves speed. While greater distance increases range it may reduce performance.
Repeat with additional mesh nodes.
3. Power on Mesh
Insert the power cable to the back of the router and plug the power supply into a power outlet. An LED will turn on signifying the unit is powered on.
See below for more information on wirelessly vs wired meshing.
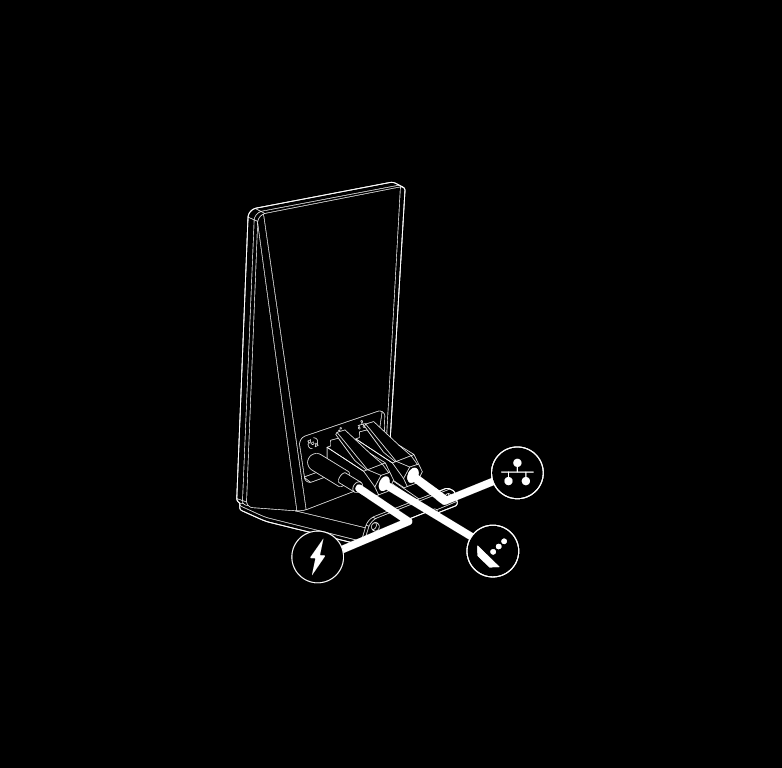
ETHERNET PORT
Using the RJ45 Port
- Remove the Starlink Plug

- Plug in the Mini Starlink Cable available on the Starlink Shop or your own ethernet cable into the port. Connect the other end of your cable to your wired mesh or third-party hardware.
Note: This product is no longer rated IP67 with a standard RJ45 cable.
ADDING MESH(ES) TO NETWORK
WIRED MESH GUIDE

- Set up your Starlink Kit as shown in the install instructions and ensure you are online.
- Place your Starlink Router Mini in the desired location and connect the power supply.
- Plug in an ethernet cable into the LAN port of the back of your existing Starlink router or Starlink Mini. For Gen 3 router you will need to remove the protective cover to access the ports.
- Run the ethernet cable from the main router to your Starlink Router Mini. Connect to the WAN port of your router (Starlink symbol) to create a wired mesh network.
- For a wired connection to a Starlink Mini Kit, use the 15m Mini Starlink Ethernet Cable to ensure waterproof connection.
- If connecting to another Starlink router, use a RJ45 Cat5e or greater.
- Repeat with additional mesh nodes.
WIRELESS MESH GUIDE
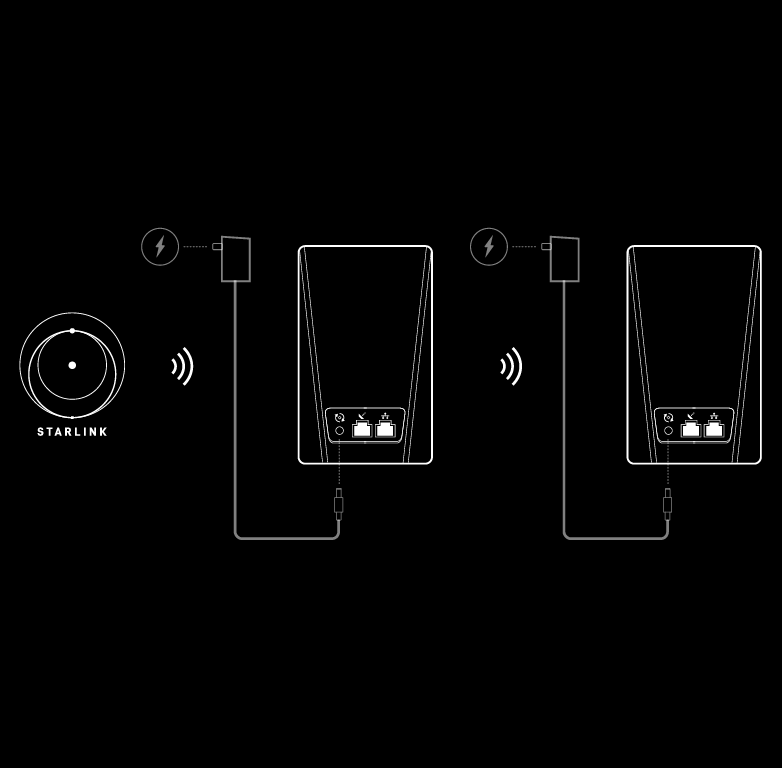
- Ensure your Starlink Kit is set up and connected to the internet prior to adding your mesh nodes.
- Find suitable install locations for your mesh nodes and plug them into power outlets.
- Open the Starlink App.
- Wait 1-2 minutes for a "New Mesh Node(s)" notification to appear in the app.
- If a notification does not appear in the app, try positioning your router closer to your main router.
- Tap "Pair" or "Pair All". The node(s) will begin connecting on the "Network" screen. Connection will take about 1-5 minutes.
- Repeat with additional mesh nodes